Wednesday, May 31, 2017

KVQG Opportunity Quilt for 2017

Every year members of the Kaw Valley Quilters Guild make a quilt to raise money to help support guild programs. A small group usually makes the quilt and then one of our talented longarmers quilts it. The drawing for the quilt is usually held at our Fall mini retreat, at which time the new quilt is unveiled. This year, the drawing will be at the guild's 40th Anniversary Jubilee Celebration in September.

The punnily named Sew Whatever's (I love their name) group: Karla Menaugh, Georgann Eglinski, Carol Jones, Sarah Fayman, Roseanne Smith, Kathe Dougherty, Wendy Turnbull and Beth Stella - have been together quite a while.  They meet weekly at Sarah's Fabrics to sew and visit.

Last year, the Sew Whatevers, along with friends Linda Frost and Kathy Supernant, decided to take on the task of the opportunity quilt. Since 2017 is the 40th - Ruby Anniversary of our guild, they chose to make the quilt ruby and white. And IT IS STUNNING!


The unusual blocks come from the book Nearly Insane by Liz Lois. As soon as Wendy told me about the book, I ordered it. Can't wait for it to get here.

They knew they wanted blocks around a center medallion. They looked up pictures of the ruby nasturtium (40th Anniversary Flower) to design the center applique. Wendy Turnbull expertly did the applique and Kathy Supernant stitched the green stems and curlies.

The incomparable longarmer Lori Kukuk quilted this lovely with circles of feathers, grids, and some echo quilting around the applique wreath. 

The Kaw Valley Quilters Guild is selling tickets for opportunities to win this gorgeous quilt. I've had it out at several venues so far and will have it at (hopefully) the July Sidewalk Sale, the Douglas County Fair, and other venues around town from now until September, The tickets are $1 each or 6 for $5. If you would like to own this quilt, or support the KVQG, buy a ticket or five. Just let me know.

Curious about the KVQG? Check us out!


Wednesday, May 10, 2017

Vintage Rose by Judy Niemeyer - Part One

I'm not sure I even know where to start. The beginning maybe?

I've been watching the Judy Niemeyer and Quiltworx phenomena for a few years. The patterns are really stunning and look very complex. Last fall I saw the new teaching piece Vintage Rose and fell in love.
OK, I have to make this. 

Thus begins my search for a workshop. I consider myself an experienced paper piecer, but I have never made a Judy Niemeyer (JN) quilt before and it seemed a little daunting. I won't go through the list of workshops I looked at - suffice it to say I was looking at everything from Montana to Phoenix. I found the perfect workshop at Kinderhook Lodge in Barry Illinois. It was sponsored by JN Certified shop Peddler's Way in Washington Illinois. Perfect place (4 hours drive), perfect time (beginning of May), and did not break the bank.

Diane and Linda, the ladies at Peddler's Way Quilt Company were so nice and helpful in getting me started. I ordered my pattern - the instructions and foundation papers - from them. On their advice, I signed up for Quiltster, an online program that enables quilters to design color placement on JN quilts. Given that there are hundreds (or more) pieces and thousands of coloring possibilities, there is no way I could have chosen colors without using Quiltster.  I worked up four possibilities and finally decided on a turquoise, orange, and pink colorway.

Since the workshop was only four days and the project quite intense, we had some prep work to do. Here is where it really started getting challenging. I've done a lot of paper piecing, but Judy's process includes cutting and stacking pieces so that the quilter can assembly line sew or chain piece. This was new to me. 


Judy's foundation papers are printed on newsprint, and included in the pattern are cutting templates. The directions indicate what size to cut large chunks of fabric. I pinned the newsprint cutting template to the fabric chunk and then cut along the indicated cutting lines. Most of the time my color choice required a stack of eight fabrics. So now for each section I have lots of stacks of fabrics clipped to the newsprint template. 

Ok, so I have my fabrics, most of them precut; pattern read, reread and highlighted; sewing machine and supplies packed; I'm ready to go.

Kinderhook Lodge is just across the Mississippi River from Hannibal Missouri. Good luck that there are at least three quilt shops between here and there - I decided to stop at two - Missouri Star in Hamilton and Hickory Stick Quilt Shop in Hannibal. Let's just say I left some money at each one.


Kinderhook Lodge is a beautiful facility - great food, and a peaceful setting. I'm hoping our guild can arrange some retreats there. Our Vintage Rose cohort is already planning a reunion next year.

So, are you curious about foundation piecing the Judy Niemeyer way? Stay tuned for Part 2!


Monday, May 8, 2017

Tile Applique

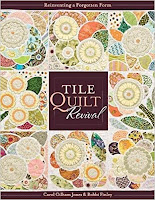
I have long drooled over the gorgeous tile applique quilts in Carole Jones' book Tile Quilt Revival. So when a sample of a small tile quilt appeared on the wall at Sarah's Fabrics with a sign saying classes were forming, I jumped at the chance to take it. 

Three wows - getting to take a class from Carol, whose work I have admired for years, the class pattern - sort of stylized leaves, and the fabric in the class kit - Kaffe. I couldn't pass it up.

I did have a bit of angst though. I had taken classes and tried four or five variations of needle turn hand applique (needle turn, prepared pieces, back basted) and it never caught on. I did not like hand applique. One might even say it stronger - I loathed hand applique.
But I went into this with a positive attitude - after all it had 3 wows going for it. 

So, what makes this tile applique? The grout! The shapes are basted right next to each other so that when 1/8 inch allowance from each shape is turned under, it looks tile with grout in between.

Carol is a great teacher. The pattern was just complex enough so that I wouldn't lose interest, but not so difficult that I'd never finish. Of course the Kaffe fabrics were a wonderful mix of color and pattern. Her verbal and written directions were spot on - she had us use freezer paper to trace the pattern and cut out the shapes, baste them in place and in no time I found myself with needle in hand, turning under a 1/8 inch seam allowance.


Now just 2 short weeks later, I have one (of four) panels completed and have started on the second. And I am loving it! My grouts are almost consistent, points are pointy, and inner curves are curvy and I'm loving the look of it.

Curious about Tile Applique? Check out Carol's book. It's a old technique but with a fresh new look.


Monday, May 1, 2017

A Design Wall of My Dreams

For most of us, a design wall is a necessity, not a luxury. The size of your design wall, like the size of your fabric stash  . . .  now that's another matter.

For years I had been making do with a portable design wall that looks very much like the projector screens we used to use many years ago - a stand with a roll up screen made of a clingy batting-like material. It was great for my small space. They are made here in Kansas and are a great product. Check them out at Pals Products.

But that was then. Now I find that I have outgrown my portable design wall. I keep having to take projects down to put up new projects. Because of my wonderful rotation system, I like to work on multiple projects at the same time. I need more space. I'd love 3 or 4 design walls.

I have my studio set up in my walk out basement and therefore only have really one wall available to mount a design wall. Half of that wall is taken up with IKEA bookshelves that hold my books, embroidery designs, some projects, Accuquilt GO dies, and my yardage fabrics. 

So, here is where the genius comes in (if I do say so myself). There is a soffit (right word?) encasing heating and air ducts right in front of the wall calling out for a design wall. I had seen sliding walls on Pinterest - OK, so why not put sliding design walls in this space? Sounds feasible, but beyond my skillset.

Enter Mike McKinney. I was referred to Mike by a quilting acquaintance. I explained what I wanted and he sounded positive. Yes, he could do that.  
So we (he did the hard work, I wrapped insulation board with flannel) mounted one design wall right on the wall. Since I do a lot of quilts with black background, this wall was covered with black flannel.


Next Mike built frames for two more design walls and mounted two tracks into the bottom of the soffit.

Now I have 3 design walls - a black one mounted to the wall, a grey one on the track closest to the wall, and a huge cream one on the outside. I can slide them around to have access to the book case,on and to look at the work on all the walls. 


I am keeping all three walls in use all the time. Currently I have Eclipse on the black wall, Kaffe Fassett on the grey wall and several small blocks on the white wall.


If you want Mike to build a sliding design wall for you, let me know.