Showing posts with label applique. Show all posts

Sunday, January 3, 2021

50 Quilts from 50 States - Oklahoma

 I didn't finish as many of my 50/50 quilts as I had planned - life really took a turn in 2020. But I did finish OKIE DOKIE my Oklahoma quilt.

In the past, Oklahoma has been a state I drove through to get somewhere else, or the place I met my kids' Dad for a handoff so that they could visit him in Texas. But as I started to explore different parts of the state I learned there's so much more. I really love the red dirt peaking through the rolling hills. 

Route 66 runs right through the state, so that was the inspiration for the quilt. It was established in 1926 and was one of the original highways in the US Highway system.  I like to imagine a young family driving Route 66 in the 1930's on a little adventure from Chicago to Los Angeles. 

The centerpiece of the quilt is a colorful tea towel I got at an Oklahoma rest stop and information center on Interstate 40 on my way to Arizona a couple of years ago. It lent itself perfectly to a quilt with 30s reproduction fabric. OK, an idea was starting to coalesce.


Traditional quilt blocks, a Route 66 sign, and a sillouette of the End of the Trail statute found in the National Cowboy museum, combined with the Oklahoma tea towel  - this is going to be a cute quilt. 

My friend Patti Pearce makes a lot of quilts with vintage linens, so she was the perfect person to quilt this. She did a fantastic job.

I've written a pattern for OKIE DOKIE and its available in my Etsy Shop. I love that my adventure is continuing state by state. 

Curious about Oklahoma? Check it Out!


Wednesday, May 9, 2018

A New Quilt From Start to Finish - Chapter 5 Appliqueing the Cat Tails

Stitch n peel.jpgIn among the foundation piecing on Cat Tail Memories (yes, I've decided to name her), are some lovely applique cat tails and stems. What's the big deal about applique, you ask?

Well, Judy does applique in a WOW way. In each of her patterns that includes applique, she includes lazer cut sheets for each applique shape. Stitch-N-Peel sheets. These sheets are a cellulose material that softens when washed so you can leave it in. It can't be much easier than that! 

All you have to do is peel the paper off the sticky side of the applique sheet and stick it to the wrong side of your fabric. Then cut it out with a .25" seam allowance, add a little glue stick and turn the edges under. And Voila! Each group of cattails leaves gets 3 or 4 of the fuzzy cuties.

The applique shapes in this pattern are quite simple. Some of her other patterns  - Paradise in Blooms, Pepperdish, Cactus Rose, Diamond Wedding Ring, and Flowers for my Wedding Ring (I'm sure there are more) - have extremely intricate applique that would be so easy with Judy's Stitch-N-Peel method.    

Curious? If you want to try Stitch-N-Peel in other applique patterns, you can order it from Judy's website.


P.S. If you missed Chapters 1-4 of my Cat Tail Memories posts, you can read them here.
Chapter 1 - Design
Chapter 2 - Color and Fabric
Chapter 3 - Preparing Papers and Fabric
Chapter 4 - Foundation Paper Piecing

Saturday, February 10, 2018

Reverse Applique Version 2 - Rob Appell

I've already written about Reverse Applique a while back - I took a great class from The Singing Quilter Cathy Miller based on the Panamanian Mola. Cathy calls it Mock Mola. 

Come to find out, Cathy is not the only quilter teaching Reverse Applique. Rob Appell, of Man Sewing, visited the Kaw Valley Quilters Guild and did a fantastic workshop on a Reverse Applique workshop. Imagine! Two great Reverse Applique teachers!

There are a few differences in the techniques offered by the two teachers. Cathy had us draw the design on Golden Threads quilting paper. Then we sewed through the paper onto the back side of fabric. Rob had us draw the design on the front of the fabric with a chalk or washable marking pen.

Cathy asked us to pay close attention to the grain of the fabric and make sure to use a zigzag stitch on the seams that were in danger of raveling. Rob just had us sew the entire design with a free motion technique (straight stitch).


As I described in my previous post, I took inspiration from the Panamanian traditional Mola for Cathy's Mock Mola class.  For this design I followed Mola inspiration and added in multiple colors.


For Rob's class I wanted to do a peacock and use Kaffe Fassett fabric. I'm not much of a sketch artist, so I relied on free clip art drawings from the internet. Stencil designs work well. I nipped over to Kinkos and had my 8.5x11 inch peacock blown up to 24x36 inches - a great size for a wall hanging. I used tracing paper to transfer the design to the fabric - my main fabric is black, so I couldn't use a lightbox.

I used a turqoise blue millifiori by Kaffe Fassett sandwiched with batting in between two layers of black batik. I like the look so far. 


I'll do an update when I've finished. 

Curious about Reverse Applique?
Check out Rob and Cathy.


Saturday, January 13, 2018

Fair Isle Winter - A 2017 BOM by Reeze Hanson

I started this beauty last January. Every year, the talented Reeze Hanson of Morning Glory Designs offers us a free BOM. After seeing Fair Isle Winter, I jumped on that wagon and took off.  I love the blue and decided on a pale yellow for the background. I guess I'm channeling my inner Swede on this one. 


Most of the blocks are foundation pieced - one of my favorite techniques - with some cool applique shapes in the corners of the blocks.

I've loved collecting blue batiks - everything from true blue to blue-green, blue with lavender, teal, and turquoise. So many beautiful fabrics out there.

I have almost kept current on this one - well, better than other BOMs - I'm on month 8 and am catching up quickly. I made a boo-boo and used a dark blue where I was supposed to use a yellow background. I decided there were too many seams to take out so I would leave it the way it was - Sorry Reeze, I added a new design element to block 8.

There are 13 sashing blocks that I want to start on next. I've pinned the blocks on my design wall so that I can decide which blues to use for the sashing. At this point I'm thinking of a true blue - or an aqua?

The BOM ends in a month when Reeze sends out the last block. Each of the previous blocks is available on  her website for $5. Next month, they will all be gone, but the entire pattern will be available. If you want a foundation piecing challenge with a series of gorgeous blocks and an unusual setting, then Fair Isle Winter is for you.

Curious about Reeze Hanson? Check her out! You'll love her stuff.


Friday, January 5, 2018

Kansas Goes Modern - A Technique Quilt

Last year I had the privilege of designing the BOM for the Kaw Valley Quilters Guild. Our guild offers a BOM every year and I had always wanted to write a pattern  . . . so I volunteered. Occasionally I like to challenge myself, and man oh man, this was a challenge.

I don't remember when and how the idea came to me, but I wanted to do a quilt with Kansas named blocks.  These blocks usually have a  traditional feel, which is not really my style. So, I decided to give them a bit of a twist by using modern fabric - Grunge by Moda -  and a non-traditional layout. Hence the name - Kansas Goes Modern (KGM).


I also wanted to learn a little more about the quilting history of my adopted state of Kansas. I am not a quilt historian, but it was fun to learn about the history of each of the blocks. Much of the information came from Barbara Brackman, a member of our guild and a nationally known quilt historian.


Since I get really enjoyment from learning and teaching, I decided to throw some interesting and varied techniques into KGM. So I included pieced blocks, English Paper Pieced blocks, foundation paper pieced blocks, and applique blocks. 


So, the blocks - all with Kansas in the name:
     Kansas Star
     Kansas Troubles
     Kansas Dugout
     Kansas Beauty
     Kansas Twister
     Kansas Dust Storm
     Rocky Road to Kansas
     Kansas Sunflower
     Hearth and Home's Kansas 

After getting it all assembled, I asked the wonderfully talented Sandra Morgan-Cockrum to quilt KGM. She did a terrific job with lots of custom designs, ruler work, and swirls.


Now, after releasing one block a month and three months of assembly instructions, I am putting everything together in a pattern that will be available for purchase in the next few months (one of my goals for 2018). I am so excited about this. I have to get some good pictures taken and put the finishing touches on the pattern - but I'm almost there!

My next steps are to take KGM on the road as a workshop or series of classes. So, if you are interested in making KGM in class, please let me know. Hopefully it will be coming to a shop or guild near you!

Curious about Kansas quilt blocks? Check out Kansas Goes Modern!


Wednesday, May 31, 2017

KVQG Opportunity Quilt for 2017

Every year members of the Kaw Valley Quilters Guild make a quilt to raise money to help support guild programs. A small group usually makes the quilt and then one of our talented longarmers quilts it. The drawing for the quilt is usually held at our Fall mini retreat, at which time the new quilt is unveiled. This year, the drawing will be at the guild's 40th Anniversary Jubilee Celebration in September.

The punnily named Sew Whatever's (I love their name) group: Karla Menaugh, Georgann Eglinski, Carol Jones, Sarah Fayman, Roseanne Smith, Kathe Dougherty, Wendy Turnbull and Beth Stella - have been together quite a while.  They meet weekly at Sarah's Fabrics to sew and visit.

Last year, the Sew Whatevers, along with friends Linda Frost and Kathy Supernant, decided to take on the task of the opportunity quilt. Since 2017 is the 40th - Ruby Anniversary of our guild, they chose to make the quilt ruby and white. And IT IS STUNNING!


The unusual blocks come from the book Nearly Insane by Liz Lois. As soon as Wendy told me about the book, I ordered it. Can't wait for it to get here.

They knew they wanted blocks around a center medallion. They looked up pictures of the ruby nasturtium (40th Anniversary Flower) to design the center applique. Wendy Turnbull expertly did the applique and Kathy Supernant stitched the green stems and curlies.

The incomparable longarmer Lori Kukuk quilted this lovely with circles of feathers, grids, and some echo quilting around the applique wreath. 

The Kaw Valley Quilters Guild is selling tickets for opportunities to win this gorgeous quilt. I've had it out at several venues so far and will have it at (hopefully) the July Sidewalk Sale, the Douglas County Fair, and other venues around town from now until September, The tickets are $1 each or 6 for $5. If you would like to own this quilt, or support the KVQG, buy a ticket or five. Just let me know.

Curious about the KVQG? Check us out!


Monday, May 8, 2017

Tile Applique

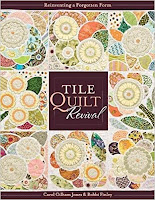
I have long drooled over the gorgeous tile applique quilts in Carole Jones' book Tile Quilt Revival. So when a sample of a small tile quilt appeared on the wall at Sarah's Fabrics with a sign saying classes were forming, I jumped at the chance to take it. 

Three wows - getting to take a class from Carol, whose work I have admired for years, the class pattern - sort of stylized leaves, and the fabric in the class kit - Kaffe. I couldn't pass it up.

I did have a bit of angst though. I had taken classes and tried four or five variations of needle turn hand applique (needle turn, prepared pieces, back basted) and it never caught on. I did not like hand applique. One might even say it stronger - I loathed hand applique.
But I went into this with a positive attitude - after all it had 3 wows going for it. 

So, what makes this tile applique? The grout! The shapes are basted right next to each other so that when 1/8 inch allowance from each shape is turned under, it looks tile with grout in between.

Carol is a great teacher. The pattern was just complex enough so that I wouldn't lose interest, but not so difficult that I'd never finish. Of course the Kaffe fabrics were a wonderful mix of color and pattern. Her verbal and written directions were spot on - she had us use freezer paper to trace the pattern and cut out the shapes, baste them in place and in no time I found myself with needle in hand, turning under a 1/8 inch seam allowance.


Now just 2 short weeks later, I have one (of four) panels completed and have started on the second. And I am loving it! My grouts are almost consistent, points are pointy, and inner curves are curvy and I'm loving the look of it.

Curious about Tile Applique? Check out Carol's book. It's a old technique but with a fresh new look.


Thursday, January 26, 2017

Panamanian Mola


A Mola? What's that? OK, let's ask Wikipedia

A Mola is a fabric panel made and used by Kuna women of Panama to create their beautiful traditional outfits.  The panels are made by reverse appliqueing and then cutting away the top layer to reveal the colorful fabric underneath.


Authentic Mola includes hundreds of pieces and very tiny hand stitching.  Quilt shows occasionally have booths that sell products made from Mola pieces.  I bought a pair of Mola shoes at a show in Iowa that are absolutely adorable.

Cathy Miller, also known as the singing quilter, taught a workshop in Leavenworth this past fall, called Mock Mola. It was "mock" because we used machines and raw edge applique. It was "mola" because the process is similar to, and some of our designs were inspired by, traditional Mola.

We drew the design on thin quilting paper, attached it to the back of a quilt sandwich, sewed on the lines, and then cut away the top layer to show the fabric underneath. In order to make my simple mola more in line with traditional mola, I used different colors of batiks in different sections of the sandwich, so that when the top layer of black batik was cut away, surprise!! different colors of batiks showed through. It's important to use batik or other tightly woven fabric to limit fraying when cutting the top layer away.

OK, so when creating this design, I had so many ideas, that I will probably do several more of these. I'd also like to try making one with more, smaller motifs - more like the traditional ones. Cathy Miller was a great teacher, so if you have a chance to take a class from her, I highly recommend it. 


Like Mola? Try it, you'll enjoy it!


Friday, January 20, 2017

Houston Class #3 - Wool Applique with Catherine Redford

As you can tell by most of the pictures in my blog, I like modern, colorful quilts.  In the past I've been able to resist the temptation of wool applique because most of the patterns were very traditional or primitive in style. Not so anymore.

The new trend in wool applique is whimsical, colorful, and full of wonderful embellishments. So, count me in! 

I've had my eye on Sue Spargo's work for a couple of years now. Unfortunately I haven't had the opportunity to take classes from her.  So it was lucky for me that Catherine Redford was teaching wool applique among other things in Houston.

Our kits included wool, cotton, applique threads, and embellishment threads to make a little needle case like this one. I'm not finished yet, but I am really enjoying it. It's refreshing to be able to applique without having to prepare the applique pieces. That's the beauty of wool!

Catherine's pieces are awesome and she is a great teacher. She also teaches beading and embroidery embellishments.  To see more of her work, check out her website.


While at Houston, I bought a wonderful wool applique pattern by Australian quilter Wendy Williams. Round the Garden is quite an ambitions project, but I'm itching to start on it. I bought a piece of linen for the background and have begun collections wool felt for the applique.


Look for updates on Round the Garden later this year.


Wednesday, December 28, 2016

Zen Garden Quilt Update

Here's a finished one for you! 

I finally finished Step-Daughter Lynne's Zen Garden Quilt. If you missed the first posting about this quilt, you can check it out here
Yahooooo!  I really liked how it turned out. Lori Kukuk did a great job with the quilting. 
It hung in the KVQG annual quilt show last April. 


I was going to use a BL Sashiko machine to stitch the water lines, but decided to use perl cotton and add the stitches by hand.


Lori's quilting added little flowers into the cherry blossom hexies. 


This was fun in so many ways - using Daiwabo Japanese taupe fabrics, EPP, working from a picture instead of a pattern, adding in my own touches like the clamshell river rocks at the lower edge of the quilt.

I love moving a quilt from "a work in progress" quilt to a finished quilt. It hasn't made its way to Lynne in Portland yet, but it will soon.

Here's to a finish!

Tuesday, December 13, 2016

Sedona Star Update

Yes, I am STILL working on Sedona Star . . .
But I am making good progress.
I am currently working on a series of 3 different applique blocks. I've finished two sets so far and they are really cool. What makes them so cool? Added applique goodies from Sarah Vedeler!!!

Of course Sarah designed Sedona Star and it uses applique shapes from her Heather Feather #1 Die from Accuquilt GO! But she also developed an embroidery design that either stands on its own or enhances the Sedona Star - its called Sedona Surprise.  I have loved doing these on my Bernina 830 and super large hoop. See all the little circles, hearts, eyelets, and outlining satin stitches? Don't they add a lot to the block?

Using the embroidery machine did present a challenge for me - and I do love a challenge.  The first challenge was a really fun one - deciding on colors that complement the Red Rooster fabrics I am using. The second challenge was a little more difficult - rehooping. Even with the jumbo Bernina hoop, I had to rehoop to get the entire design stitched out. Good thing Sarah included positioning lines that really helped. So now, although not an expert, I am at least somewhat competent at rehooping. I've done six of these blocks (three of two different layouts) and have three more to go.

Next update I'll add pictures of these blocks sewn onto the center medallion. Can't wait!
Keeping Curious!


Saturday, August 29, 2015

Zen Garden Quilt

I am in the process of making quilts for each of the kids. Amy got her "Chocolate" quilt a few years ago. I have custody of Jim's "Tumbling Out of the Jungle" quilt. AJ, who said "no thankyou", got a simple flannel quilt made of 5 inch squares. I am hoping to do a Star Wars quilt for him in the future. Dan is patiently waiting for his lime green spiral quilt - he may even change his mind before I get started. And I am closing in on finishing Lynne's quilt - Zen Garden. ZG is the second quilt in my rotation. Check this out if you want more info on my rotation system.  

I saw a Garden Path wall hanging in Quilter's Haven in Olathe and fell in love with it. A little research led me to Kitty Pippen's book, Quilting with Japanese Fabrics

I asked Lynne what kind of quilt she wanted and recommended she look through my books. One of the quilts she liked was Kitty's Japanese Garden Path quilt. That was a no-brainer for me - I knew which quilt to make for Lynne!


And I knew which fabrics I had to use. Quilter's Haven has a wide variety of Daiwabo Japanese Taupes, so I started stocking up.  Lynne said she likes green and reds, so I decided to do the path in dusty greens, ranging from light to dark. The cherry blossoms in dusty pink. Kitty's quilt had 2 antique kimono panels, so I added in a pair of appliqued storks.

Zen Garden enabled me to do a lot of firsts - using Daiwabo Taupes, designing a quilt from a picture, using Sashiko stitching, and most exciting for me was using paper pieced hexagons. I've posted some about English Paper Piecing. I love it - and the 1/2 inch hexies in Zen Garden was the first time I got to make them. And an obsession was born!


Kitty very effectively used Sashiko stitches to suggest a brook running through her Japanese Garden.  What the heck is Sashiko? Sashiko is a traditional Japanese stitching - usually white on indigo.


 However, I will be doing it the easy way - using the Babylock Sashiko machine. 


I started searching for some motif to replace the kimono panels. I considered Japanese family crest motifs, stylized flowers, and kimono motifs. I finally found the stork applique and amazingly it looked just like the storks in a gorgeous painting we have and that hung in the living room in the home that Lynne grew up in. I hope she will recognize and appreciate the likeness. 
   

So, at this point, I am finishing up the remaining cherry blossoms, marking and stitching the Sashiko stitches, and thinking about an appropriate quilting design. 

Hopefully Lynne's Zen Garden quilt will be done by Christmas. I think it should given my rotation system. It should be done after a couple more rotations.


Curious about Daiwabo Taupe Fabrics and Sashiko? Try it, you'll like it!