Sunday, December 31, 2017

Quilting Goals for 2018

I looked back to see if I wrote about my goals for 2017. I couldn't find anything. I did write about the new BOMs that were tempting me. Want an update? 

Overbrook Sister Sampler BOM - almost up to date.

Halo Medallion - completed up through month 3.

Down the Rabbit Hole - completed through month 2 but put away (for awhile, maybe forever).

Murder Mystery - I still don't know who dunnit, but I've completed through month 3.

Perpetually Hexie - Haven't even started. But I have all the papers!
Not a great completion rate, but I AM a BEGINNING QUILTER - I love to start projects. I'm at 80% for starting - pretty decent!

So, In an attempt to get some accountability with my goals, I figured I'd let you all know what they are - that way, when you see me you can support (embarrass) me by asking how I'm progressing on whatever project.
So, here they are - my possibly non-realistic 2018 goals.
1. Work on my quilts in accordance with my rotational system - don't skip stuff! Try to get through the entire rotation each month.

2. Post a blog post every other week - unless my friends tell me they want more. I'd also love to see more of your comments on the blog. So, if you've read this far, please send me a comment in the comment box below.

3. Prepare a trunk show and workshop for local/regional guild programs.

4. Publish my pattern for Kansas Goes Modern.

5. Design and make 2 quilts from my 50 Quilts From 50 States series.

That will keep me busy for sure. Perhaps I should do an update several times throughout the year. Oh, and please ask me how I'm progressing when you see me!

Keeping It Curious in 2018!

Monday, December 18, 2017

That's Just the Way I Roll . . .Jelly Roll, That Is

I would guess that most quilters who have been at it for longer than 2 minutes have at least one Jelly Roll in their stash. For my non-quilting family and friends (Mom), a Jelly Roll is not a tasty, fattening treat, nor is it a rapper from Nashville, but rather a collection of about 40 2.5 inch wide strips, sometimes rolled up and presented as a roll. Fabric company Moda coined the term, so other companies have other cute names - treats, buns, pops, roll ups.

As most of you know, I work at Mea Bernina, a sewing machine and quilting store, teaching machine  and quilting classes. What could be more fun, right? So at the beginning of 2016 I started teaching/hosting a club we called the Sassy Strippers - its all about fabric strips and Jelly Rolls.

This was a terrific challenge for me - to come up with different and interesting monthly projects that showcase various techniques, using our own curated jelly rolls, and then teaching the technique to anywhere from 12 to 20 sassy gals.  It was soooo much fun!

So we started where every self-respecting quilter would start - with the Jelly Roll Race. Did you know there is more than one? Jenny Doan of Missouri Star Quilt Company made a video tutorial that really popularized the JR Race.

Our Jelly Roll was a specially curated black and white roll, with fabrics from various collections that we had at Mea Bernina. So there is no other Jelly Roll like this available anywhere. We gave each Sassy Stripper a cut of a bright solid so that they could add in squares (JR Race 2) or triangles (JR Race 3) in between the strips.  We didn't really race, but some say they have completed it in less that an hour. I should time myself sometime and see - although I'm really not a very speedy sewist.


My intention for Sassy Strippers was to do different projects - not just quilts. So for our second project we featured a wonderfully creative string market bag. Bias strips were double folded and stitched together using the Bernina Binding Attachment. Then the resulting strong, double fold strips were then sewn together at intervals to make a string bag. Terrific! Mea Bernina has kits available to make this cool bag.


But wait, there's more! I really enjoyed coming up with interesting (hopefully) projects every month. I'll write more about the other projects in later posts. If you are interested in joining the Sassy Stripper adventure with me, we will continue it next year (2018) with a bit of a twist. After 20 projects with strips, we are branching out a bit. That's at much as I'll say here, but I promise it'll be fun! So, if you are curious about different techniques, want to get creative ideas with fellow sassy sewists, check out the Mea Bernina Class and Club listing and join us in January.

Keeping Curious!

Monday, November 27, 2017

A Different Kind of Paper Pieiceing - English Paper Pieceing

I'm deep into several paper piecing projects - not foundation paper piecing (see Foundation Paper Piecing ) but rather English Paper Piecing (EPP). 

Paper Piecing / Foundation Piecing? What's the difference? Foundation piecing uses a foundation (usually paper) to sew and flip the pieces, enabling you to get really good points where it would be difficult to piece. English paper piecing uses forms (usually paper or card stock) in different shapes (hexagon, diamonds, squares, or triangles).

So, as is usual, I sort of over did it. One project led to another, then another. Before I knew it I had so many I had to organize them and make sense of what I have. 

It started innocently enough - Grandmother's Flower Garden. My Quilting Bucket List includes making a traditional quilt by hand, so what better choice than a Grandmother's Flower Garden? I even used reproduction 30s fabrics for it. To date, I have 40 out of 54 "flowers" completed. I'm going to put them together with green diamonds - so it will look something like this one. 

The Grandmother's Flower Garden got me hooked and now its a full blown addiction. Enter Katja Marek of Katja's Quilt Shoppe in Kamloops British Columbia. She has this wonderful book - The New Hexagon. In 2015 she facilitated an online Quilt Along to make a gorgeous and challenging quilt called Millefiore. It is constructed of about 14 Rosettes using the hexagons from Katja's book. This was one of the most challenging projects I've ever done. The construction is fairly straight forward, but choosing fabrics so that each round flows smoothly is quite a challenge.  I got two Rosettes done and decided to put it away for a while. Even now when I look at it, I think I might want to redo some of it.

Katja teased me again the next year with Quilts on the Go. For this Quilt Along, I decided to use Asian fabrics from my stash. This lasted through the first hexie and then I figured I'd better buy some more. Now I have 3 good sized totes filled with focus Asian fabrics to fussy cut and a bunch of fillers. This project is mush easier than Millie because each hexie stands alone. Once made, the hexies were appliqued to a backing and they were quilted. So, each one could stand alone as a mug rug; put a few together and you have a table topper; put them all together and you have a quilt.  I progressed a little further on this one, but I still have a few to make and then I'll whip-stitch them together into a quilt.

The next couple of Quilt Alongs that Katja has done are in the "collect and do later" category. We have Hex-Plosion and Perpetually Hexie. Cool projects and I couldn't stand not adding them to my EPP collection.

Katja is not the only designer doing cool EPP stuff. Tonya Owens from HillBilly Quilt Shop designed a mystery EPP with cool fabric from Paula Nadelstern (see my previous post).  Although I didn't keep current with the Quilt Along, the out-of- this-world table runner is ready to be quilted!

Another forerunner in EPP is Australian Sue Daley. I met Sue at the first Missouri Star Academy in Hamilton in May 2017. During her class, she showed (teased) us her new EPP BOM (don't ya just love the acronyms) called Round We Go. They are circles! I love them. Quilting Bits and Pieces in Eudora is hosting the BOM - starting August 2017. Again, these are in the "collect and do later" category. 

In addition to all being EPP, most of these projects have something else in common - they use lazer cut paper pieces available from PaperPieces.com. If EPP is an addiction, PaperPieces is an enabler. They carry all sorts of shapes in multiple sizes. They also have packages with all the pieces for projects. If its EPP you want, look no further.


Join me in my addiction! 


Wednesday, June 7, 2017

Rulers - The Right Tool for The Job

I'm a sucker for rulers. Quilt shops, quilt shows, trunk shows, workshops - if there is a ruler for sale I'm always looking, and usually buying.

When I started quilting, the yellow OmniGrid rulers were really the only ones available. In combination with the rotary cutter, rulers  were probably the most innovative thing to happen to quilting since the sewing machine. When I started quilting, rotary cutters and rulers had just come out, so I've never really quilted without them.

Now Creative Grids, special order rulers, designer specific, as well as other ruler companies have joined the game and there are rulers out the wazoo.  And I own a lot of them. Not as many as I could (that's how I rationalize it), but a lot.

Let's start with what I call the "traditional" rulers - most of mine are Creative Grids. I love the Creative Grids website, they have videos on how to use the rulers, which is especially helpful for the specialty rulers. Traditional rulers are the rectangle and square rulers, used for cutting squares and rectangles for piecing, and squaring up blocks. But there is so much more I can do with these basic rulers. 45 and 60 degree lines enable me to cut bias strips and triangles. The extra lines help me cut specific sizes like .25 inch seam allowances after completing foundation paper pieces. I have a long (6.5 x 24.5) and medium (6.5 x 12.5) as well as some smaller ones (2.5 x 12.5 and 4 x 12.5). Several shops have 2.5 x 6 rulers with the shop name on them - I have 2 or 3. 

Square rulers are handy for cutting, fussy cutting, as well as squaring up blocks after piecing. Technically, I could use one large ruler to square up blocks the size of the ruler and smaller. But, its much easier and always preferable to use the ruler that matches the size of the block. So - I have 3 of them - a 14.5 inch square, an 8.5 inch square, and a 6.5 inch square. And of course I covet a few more to fill in all the sizes.


OK, so these are the necessary, but somewhat boring rulers. Now, for the more exciting, enticing specialty rulers. There are tons, so I'll highlight just a few of my favorites - Stripology Squared (in this post), Hexagon and Side Kick, Trimmer by George, and  the Quick Curve Ruler (in a later post).

I learned about Gudrun Erla's Stripology ruler about a year ago and have used it a lot to make jelly roll strips and smaller strips for fabric bowls. A cool ruler.


But then Gudrun came out with her Stripology Squared ruler. It does everything the Stripology does and more - squaring up, fussy cutting, and cutting blocks in specialty patterns.


I took a class from Gudrun sponsored by Prairie Point Quilt Shop and learned all sorts of fun things to do with her new ruler - most involving layer cakes (the fabric kind, not the chocolate kind). Gudrun also designed a bunch a cool patterns to accompany the ruler. In class I worked on her Valerie pattern with these great bright fabrics from the For You collection by Zen Chic. I added some solids to have enough layer cake squares for the pattern, and some popping orange for the sashing.

This cheery quilt is in my rotation as the "free spot", so hopefully it will be finished soon. I'd better start looking for some yardage for the backing. For You is an older collection, so there isn't a lot of yardage still out there.

Next time - more specialty rulers.
I'm curious - what are your favorite specialty rulers? Let me know.


Wednesday, May 31, 2017

KVQG Opportunity Quilt for 2017

Every year members of the Kaw Valley Quilters Guild make a quilt to raise money to help support guild programs. A small group usually makes the quilt and then one of our talented longarmers quilts it. The drawing for the quilt is usually held at our Fall mini retreat, at which time the new quilt is unveiled. This year, the drawing will be at the guild's 40th Anniversary Jubilee Celebration in September.

The punnily named Sew Whatever's (I love their name) group: Karla Menaugh, Georgann Eglinski, Carol Jones, Sarah Fayman, Roseanne Smith, Kathe Dougherty, Wendy Turnbull and Beth Stella - have been together quite a while.  They meet weekly at Sarah's Fabrics to sew and visit.

Last year, the Sew Whatevers, along with friends Linda Frost and Kathy Supernant, decided to take on the task of the opportunity quilt. Since 2017 is the 40th - Ruby Anniversary of our guild, they chose to make the quilt ruby and white. And IT IS STUNNING!


The unusual blocks come from the book Nearly Insane by Liz Lois. As soon as Wendy told me about the book, I ordered it. Can't wait for it to get here.

They knew they wanted blocks around a center medallion. They looked up pictures of the ruby nasturtium (40th Anniversary Flower) to design the center applique. Wendy Turnbull expertly did the applique and Kathy Supernant stitched the green stems and curlies.

The incomparable longarmer Lori Kukuk quilted this lovely with circles of feathers, grids, and some echo quilting around the applique wreath. 

The Kaw Valley Quilters Guild is selling tickets for opportunities to win this gorgeous quilt. I've had it out at several venues so far and will have it at (hopefully) the July Sidewalk Sale, the Douglas County Fair, and other venues around town from now until September, The tickets are $1 each or 6 for $5. If you would like to own this quilt, or support the KVQG, buy a ticket or five. Just let me know.

Curious about the KVQG? Check us out!


Wednesday, May 10, 2017

Vintage Rose by Judy Niemeyer - Part One

I'm not sure I even know where to start. The beginning maybe?

I've been watching the Judy Niemeyer and Quiltworx phenomena for a few years. The patterns are really stunning and look very complex. Last fall I saw the new teaching piece Vintage Rose and fell in love.
OK, I have to make this. 

Thus begins my search for a workshop. I consider myself an experienced paper piecer, but I have never made a Judy Niemeyer (JN) quilt before and it seemed a little daunting. I won't go through the list of workshops I looked at - suffice it to say I was looking at everything from Montana to Phoenix. I found the perfect workshop at Kinderhook Lodge in Barry Illinois. It was sponsored by JN Certified shop Peddler's Way in Washington Illinois. Perfect place (4 hours drive), perfect time (beginning of May), and did not break the bank.

Diane and Linda, the ladies at Peddler's Way Quilt Company were so nice and helpful in getting me started. I ordered my pattern - the instructions and foundation papers - from them. On their advice, I signed up for Quiltster, an online program that enables quilters to design color placement on JN quilts. Given that there are hundreds (or more) pieces and thousands of coloring possibilities, there is no way I could have chosen colors without using Quiltster.  I worked up four possibilities and finally decided on a turquoise, orange, and pink colorway.

Since the workshop was only four days and the project quite intense, we had some prep work to do. Here is where it really started getting challenging. I've done a lot of paper piecing, but Judy's process includes cutting and stacking pieces so that the quilter can assembly line sew or chain piece. This was new to me. 


Judy's foundation papers are printed on newsprint, and included in the pattern are cutting templates. The directions indicate what size to cut large chunks of fabric. I pinned the newsprint cutting template to the fabric chunk and then cut along the indicated cutting lines. Most of the time my color choice required a stack of eight fabrics. So now for each section I have lots of stacks of fabrics clipped to the newsprint template. 

Ok, so I have my fabrics, most of them precut; pattern read, reread and highlighted; sewing machine and supplies packed; I'm ready to go.

Kinderhook Lodge is just across the Mississippi River from Hannibal Missouri. Good luck that there are at least three quilt shops between here and there - I decided to stop at two - Missouri Star in Hamilton and Hickory Stick Quilt Shop in Hannibal. Let's just say I left some money at each one.


Kinderhook Lodge is a beautiful facility - great food, and a peaceful setting. I'm hoping our guild can arrange some retreats there. Our Vintage Rose cohort is already planning a reunion next year.

So, are you curious about foundation piecing the Judy Niemeyer way? Stay tuned for Part 2!


Monday, May 8, 2017

Tile Applique

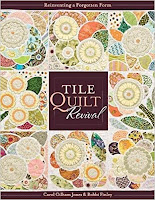
I have long drooled over the gorgeous tile applique quilts in Carole Jones' book Tile Quilt Revival. So when a sample of a small tile quilt appeared on the wall at Sarah's Fabrics with a sign saying classes were forming, I jumped at the chance to take it. 

Three wows - getting to take a class from Carol, whose work I have admired for years, the class pattern - sort of stylized leaves, and the fabric in the class kit - Kaffe. I couldn't pass it up.

I did have a bit of angst though. I had taken classes and tried four or five variations of needle turn hand applique (needle turn, prepared pieces, back basted) and it never caught on. I did not like hand applique. One might even say it stronger - I loathed hand applique.
But I went into this with a positive attitude - after all it had 3 wows going for it. 

So, what makes this tile applique? The grout! The shapes are basted right next to each other so that when 1/8 inch allowance from each shape is turned under, it looks tile with grout in between.

Carol is a great teacher. The pattern was just complex enough so that I wouldn't lose interest, but not so difficult that I'd never finish. Of course the Kaffe fabrics were a wonderful mix of color and pattern. Her verbal and written directions were spot on - she had us use freezer paper to trace the pattern and cut out the shapes, baste them in place and in no time I found myself with needle in hand, turning under a 1/8 inch seam allowance.


Now just 2 short weeks later, I have one (of four) panels completed and have started on the second. And I am loving it! My grouts are almost consistent, points are pointy, and inner curves are curvy and I'm loving the look of it.

Curious about Tile Applique? Check out Carol's book. It's a old technique but with a fresh new look.